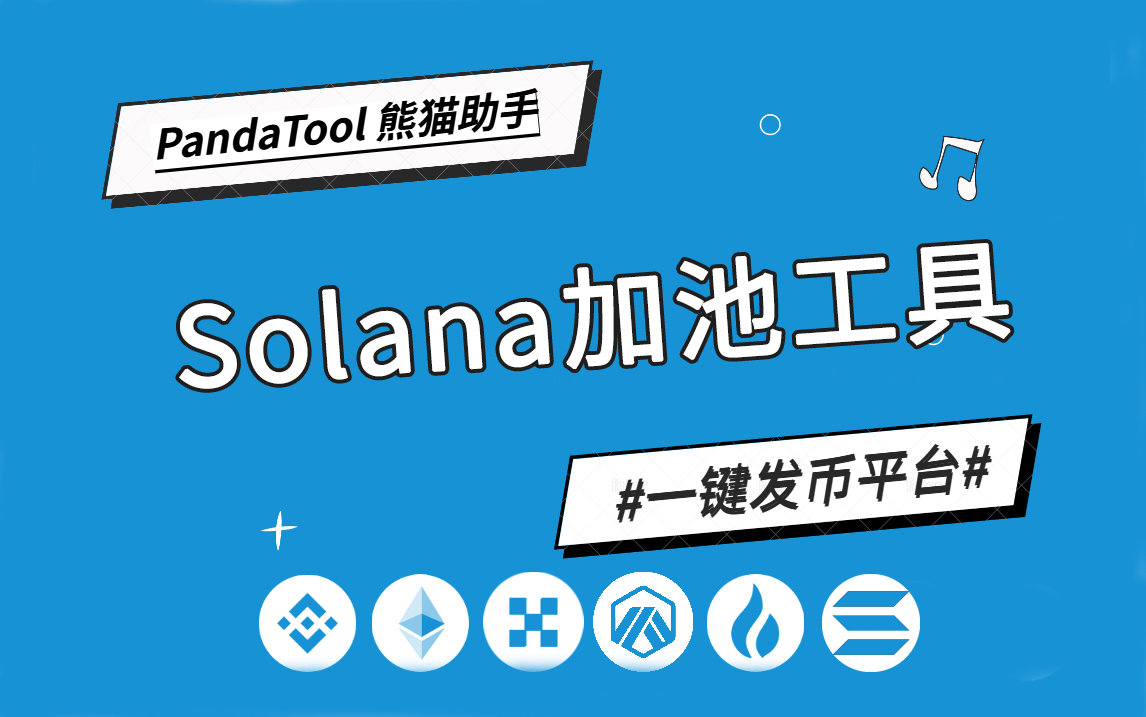
What is Raydium Pooling?
Pooling refers to creating a liquidity pool for your Solana tokens, aimed at enabling users to trade. With a liquidity pool, the Solana tokens you create have value and can be exchanged.
After pooling: Tokens can be exchanged through the liquidity pool; without pooling, they can only be transferred.
After pooling: K-line charts can be viewed on Dexscreener and Ave; without pooling, they cannot be found.
After pooling: Tokens may potentially display a price; without pooling, they definitely will not.
Next, I will demonstrate in detail how to perform Solana pooling operations.
Before pooling: If you are adding a Raydium V2 pool, please ensure you have obtained the market ID.
Before pooling: After removing the Sol for pooling, please ensure you have at least 0.6 SOL remaining in your wallet.
Before pooling: Please ensure you have installed the Phantom or OKX Web3 wallet plugin/software.
Solana Pooling Tutorial
1. Connect Wallet (Experienced users can skip)
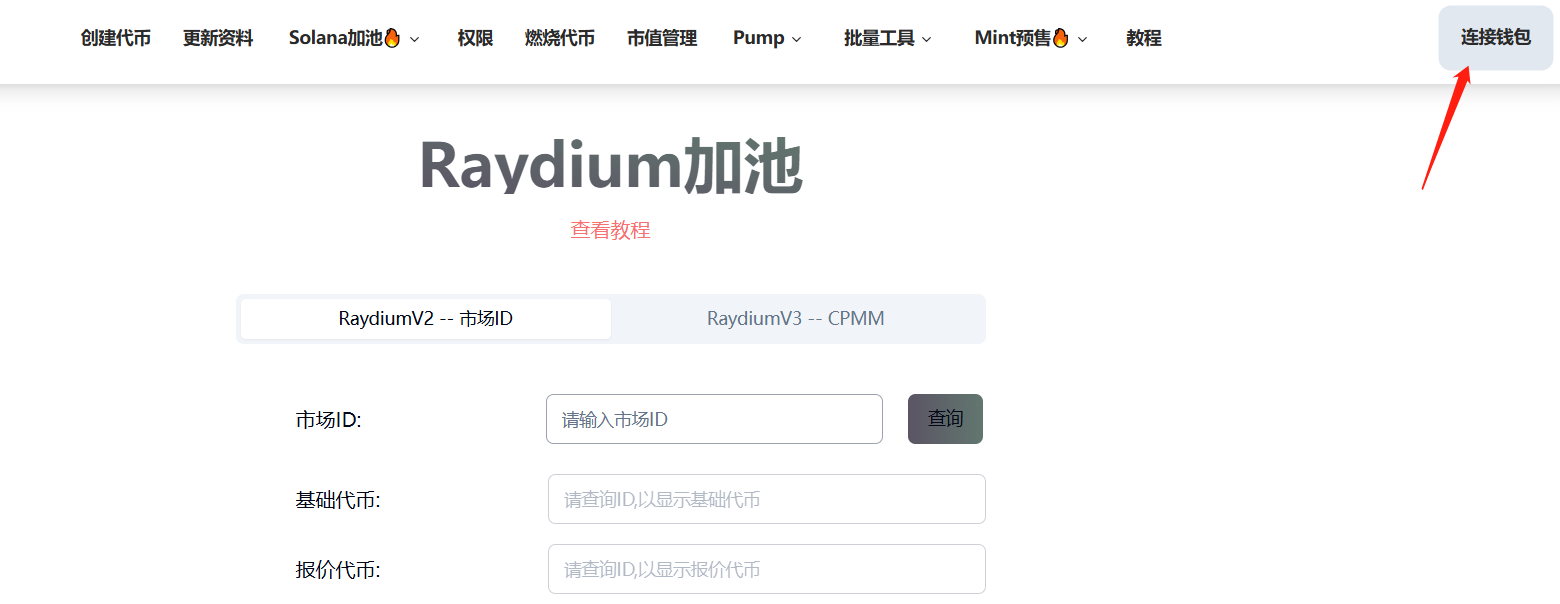
First, we open the Create Liquidity page by linking, then click on the wallet connection in the upper right corner.
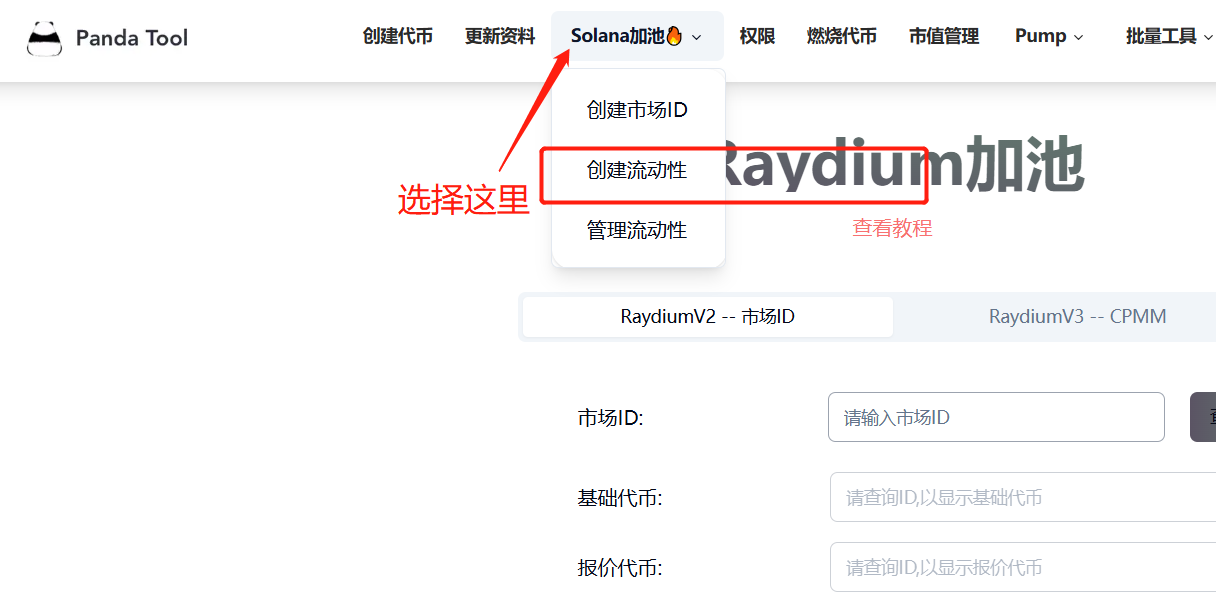
Alternatively, you can find the Solana pooling page through the navigation bar on the PandaTool official website:
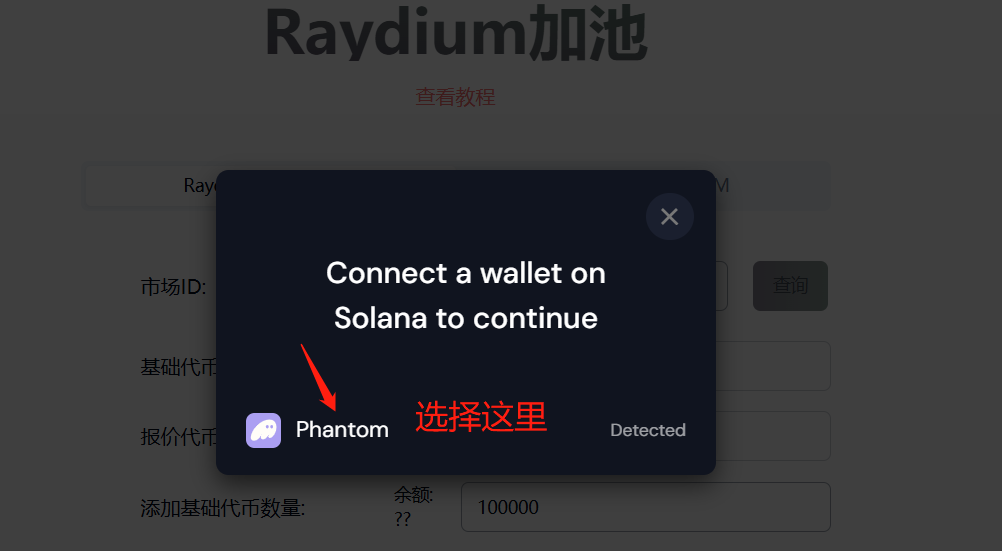
After clicking to connect the wallet, a prompt will appear asking you to select Phantom. Note that whether you are using OKX Web3 wallet or Phantom wallet, you must select Phantom, as it will automatically match.
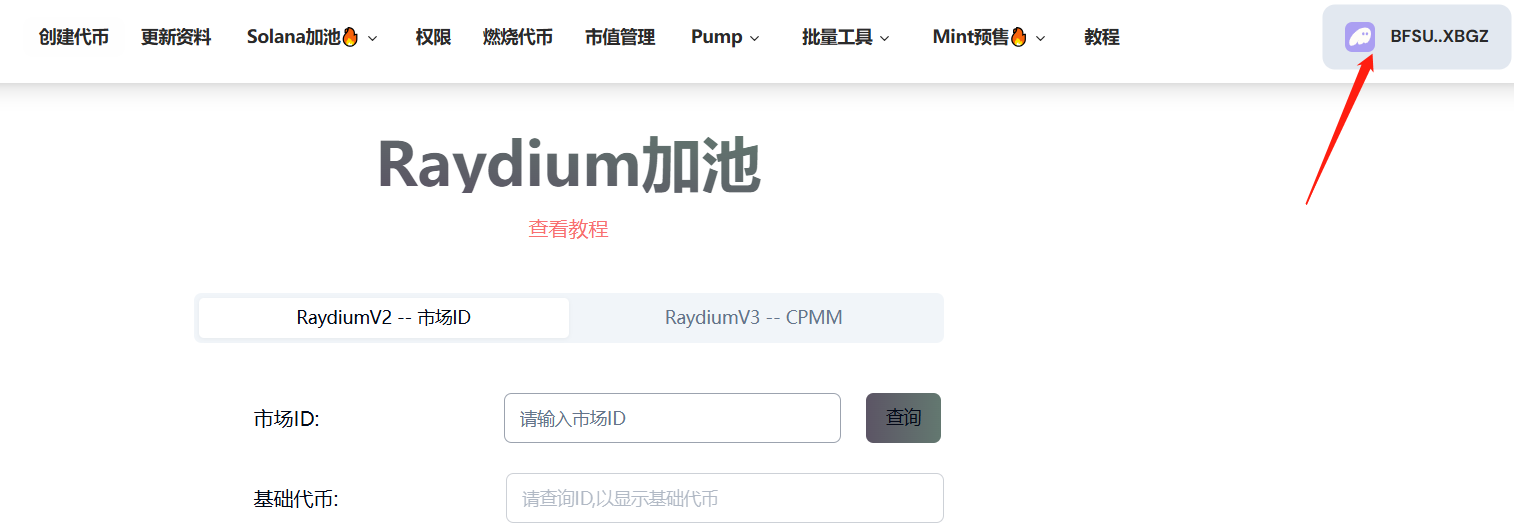
Once the wallet is successfully connected, you will see your wallet address.
Next, we can choose to create either a Raydium AMM pool or a Raydium CPMM pool. The differences between the two are as follows:
Fee difference: The fee for creating an AMM pool is around 0.6 SOL, while the fee for creating a CPMM pool is around 0.3 SOL.
Requirement difference: AMM requires an OpenBook market ID, while CPMM does not.
Stability difference: AMM liquidity pools are well-tested and more stable. CPMM is a new concept and less stable.
Support difference: AMM is supported by all trading bots and wallets, but there may be fewer that support CPMM.
Token 2022: AMM does not support Token 2022 tokens, while CPMM does.
2. Creating Raydium AMM Liquidity Tutorial
The so-called Raydium AMM, also known as AMM V4 in contract terms, is Raydium's well-tested liquidity protocol. Aside from being expensive, it has almost no drawbacks. Next, I will explain in detail how to create AMM liquidity.
First, we directly open the Raydium AMM pool creation page, where we can see the parameters as shown below.
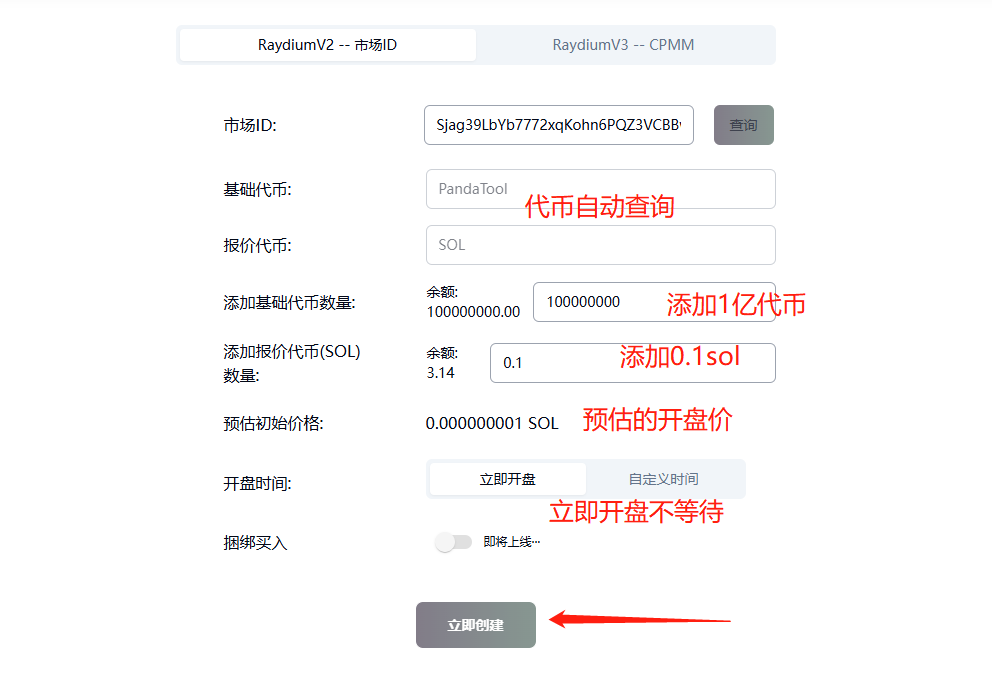
Market ID: If you have already created a market ID, you can fill it in directly and then click Query. If you have not created a market ID yet, you can create one here → solana.pandatool.org…
Base Token: This is the token you issued, i.e., the "meme coin." No need to select; the ID will be queried automatically.
Quote Token: This is the value token, such as SOL, USDT, USDC, etc. No need to select; the ID will be queried automatically.
Add Base Token Amount: How many meme coins do you plan to put into the pool (no quantity requirement).
Add Quote Token Amount: How many value tokens do you plan to put into the pool (no quantity requirement).
Estimated Initial Price: If you put in 100 meme coins + 100 USDT, then the initial opening price of the token will be 1 U. If you put in 100 meme coins + 1 SOL, then the initial opening price will be 0.01 SOL. Assuming the price of SOL is 260 U, the initial opening price will be 2.6 U.
Opening Time: Immediate opening means trading starts as soon as the pool is created; custom time means you set a specific opening time (this time is determined according to your local time zone. If you are in Singapore, it is Singapore time [UTC+8]. If you are in Dubai, it is Dubai time [UTC+4]).
Bundled Purchase: This feature supports immediate purchase upon opening (coming soon).
Based on the explanations of the various parameters above, I filled in the information as follows:
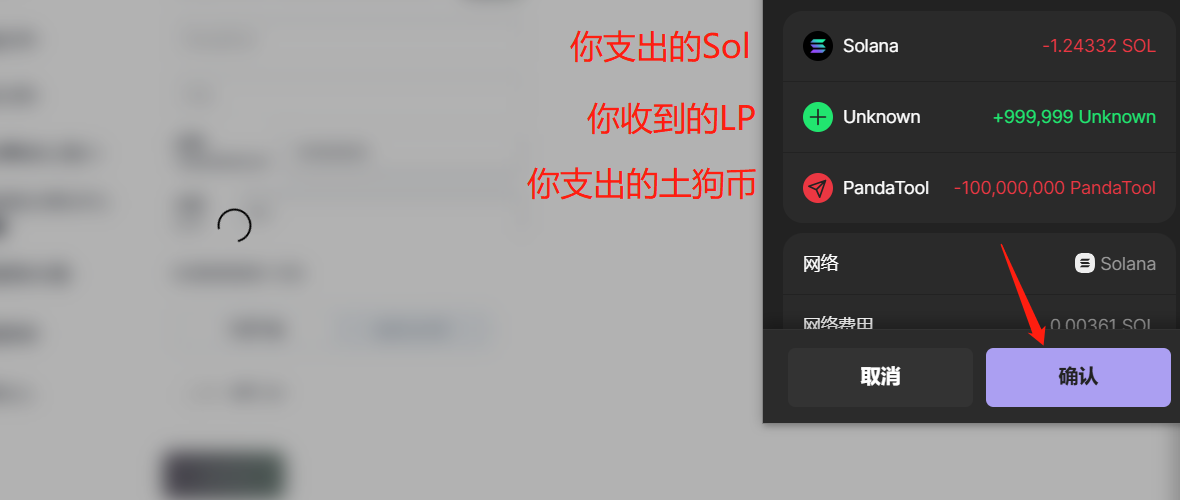
After confirming that the information is correct, we click the Create Now button, at which point a wallet confirmation will pop up (if it prompts that the amount is too large, it may be due to insufficient SOL balance).
After waiting a few seconds, the front-end page will prompt you that the transaction was successful, indicating that the pool has been successfully added.
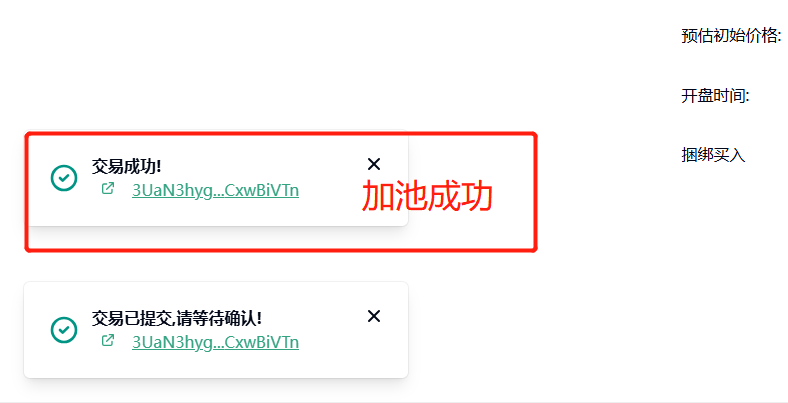
If it prompts that the pooling failed, do not panic. First, check if the wallet was charged; if it was charged, it means the pooling was successful, and it is an error prompt. If there was no charge, you will need to refresh the page and try again.
Thus, the entire Raydium AMM liquidity pool has been created, and you can now go to Raydium to trade.
3. Creating Raydium CPMM Liquidity Tutorial
As mentioned in the previous tutorial, using a CPMM liquidity pool is more convenient and cheaper. Next, I will explain in detail the creation process for the V3 liquidity pool.
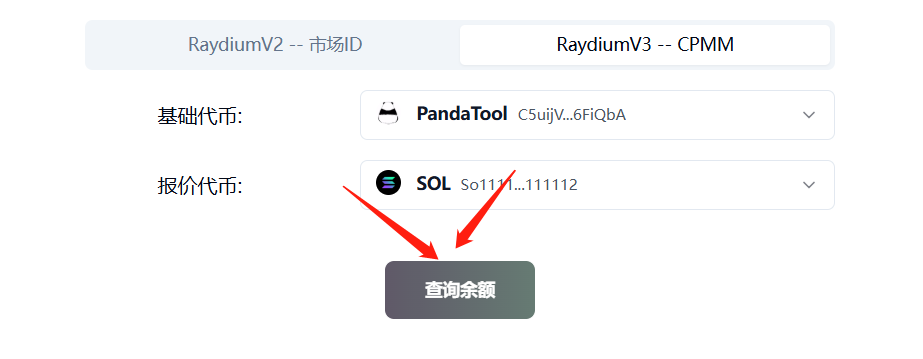
First, we open the Liquidity Creation tool and select Raydium CPMM.
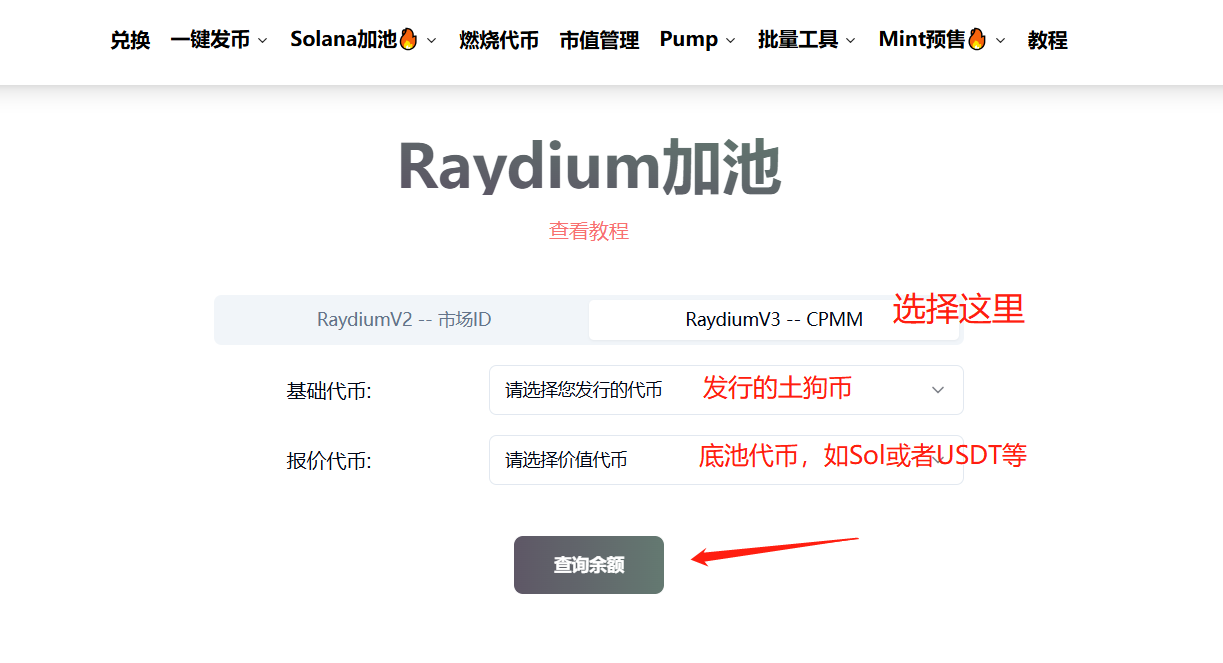
After selecting the token, click to check the balance, as shown in the image below.
Next, you need to fill in the amount of tokens to be added to the pool and some other parameters.
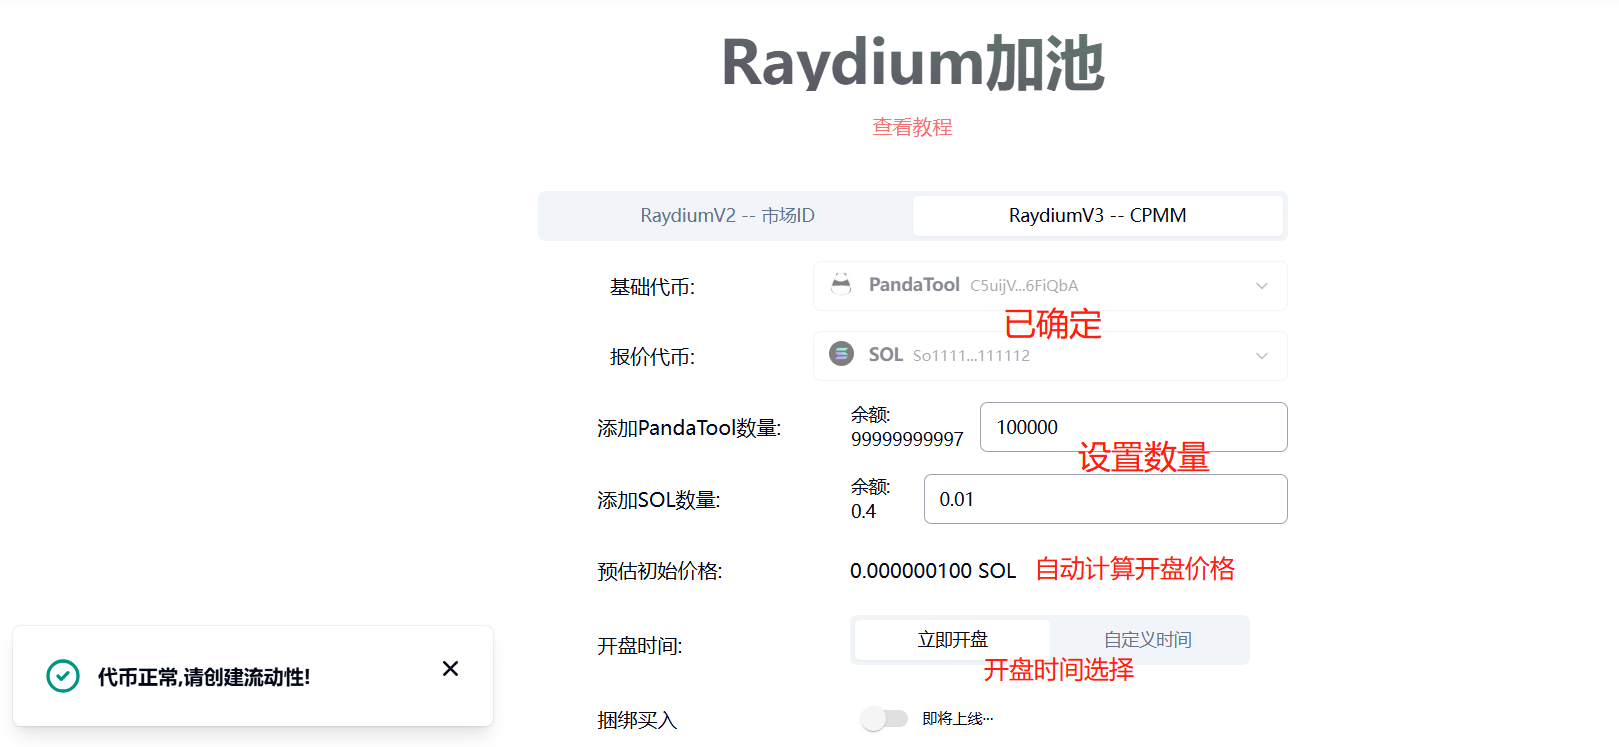
Base Token: This is the token you issued, i.e., the meme coin, which is automatically selected.
Quote Token: This is the value token, such as SOL, USDT, USDC, etc., which is automatically selected.
Add Base Token Amount: How many meme coins do you plan to put into the pool (no quantity requirement).
Add Quote Token Amount: How many value tokens do you plan to put into the pool (no quantity requirement).
Estimated Initial Price: If you put in 100 meme coins + 100 USDT, then the initial opening price of the token will be 1 U. If you put in 100 meme coins + 1 SOL, then the initial opening price will be 0.01 SOL. Assuming the price of SOL is 260 U, the initial opening price will be 2.6 U.
Opening Time: Immediate opening means trading starts as soon as the pool is created; custom time means you set a specific opening time (this time is determined according to your local time zone. If you are in Singapore, it is Singapore time [UTC+8]. If you are in Dubai, it is Dubai time [UTC+4]).
After confirming that the information is correct, we click the Create Now button, at which point a wallet confirmation will pop up.
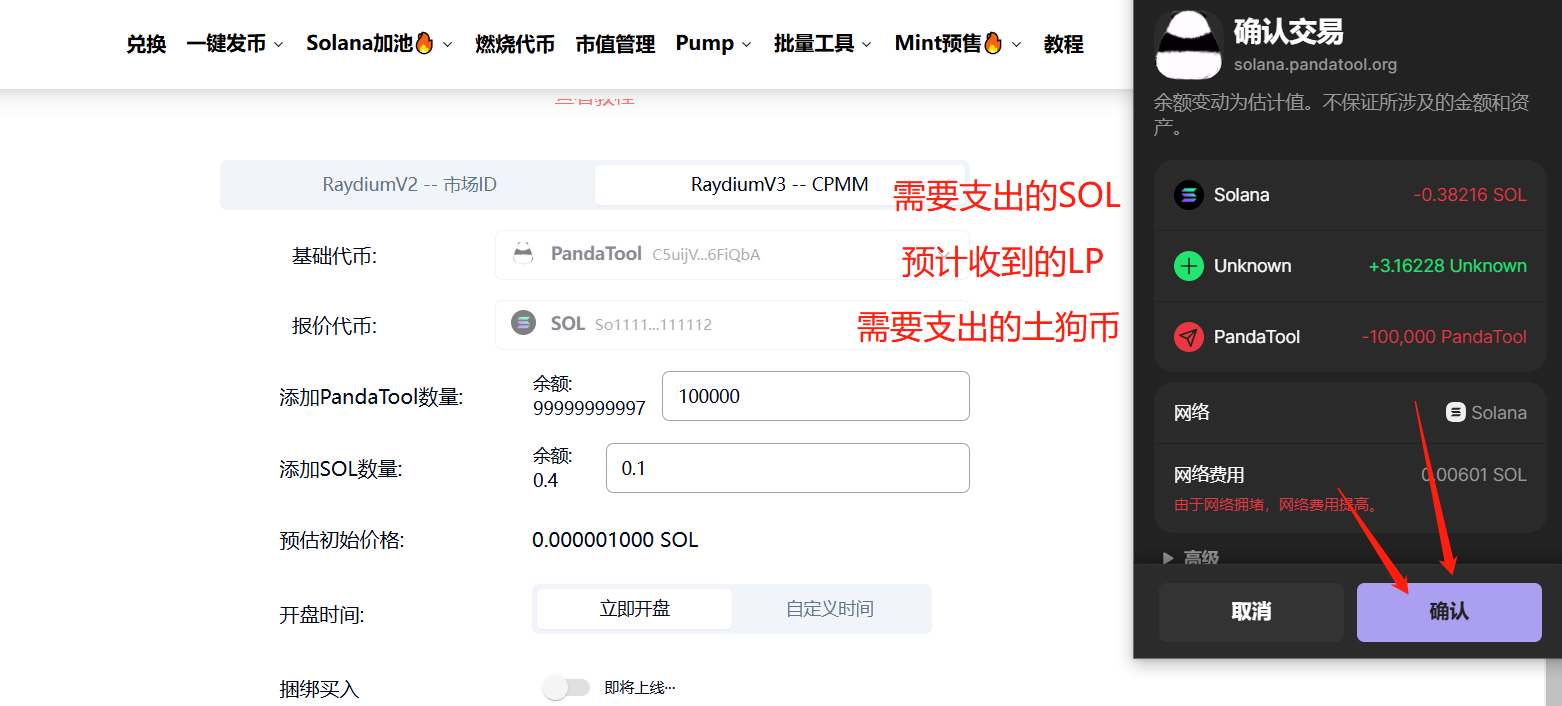
Once the wallet confirms, the pooling operation can be completed.
免责声明:本文章仅代表作者个人观点,不代表本平台的立场和观点。本文章仅供信息分享,不构成对任何人的任何投资建议。用户与作者之间的任何争议,与本平台无关。如网页中刊载的文章或图片涉及侵权,请提供相关的权利证明和身份证明发送邮件到support@aicoin.com,本平台相关工作人员将会进行核查。
