Vibe Coding Frontend Page Pitfall Record
After I created a product prototype with Vibe Coding, I naturally needed a "face"—the frontend page.
When Gemini 3 was launched, I had a decent experience and mistakenly thought that creating a frontend would be easy.
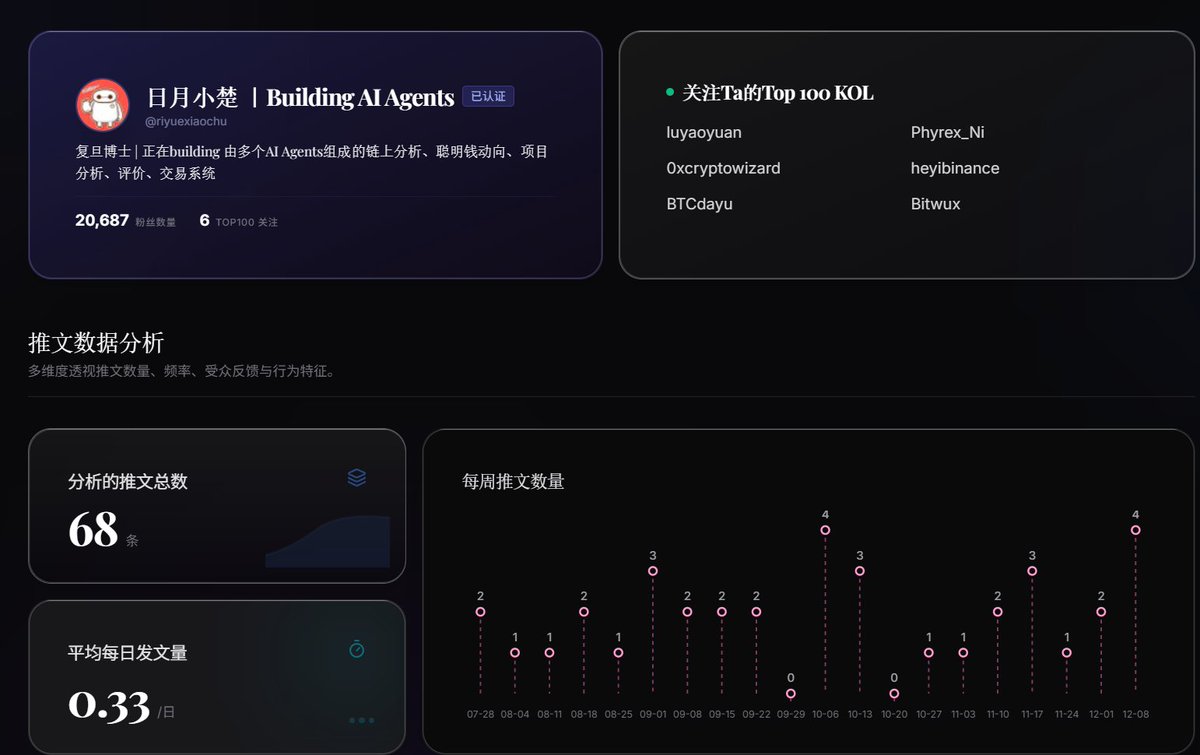
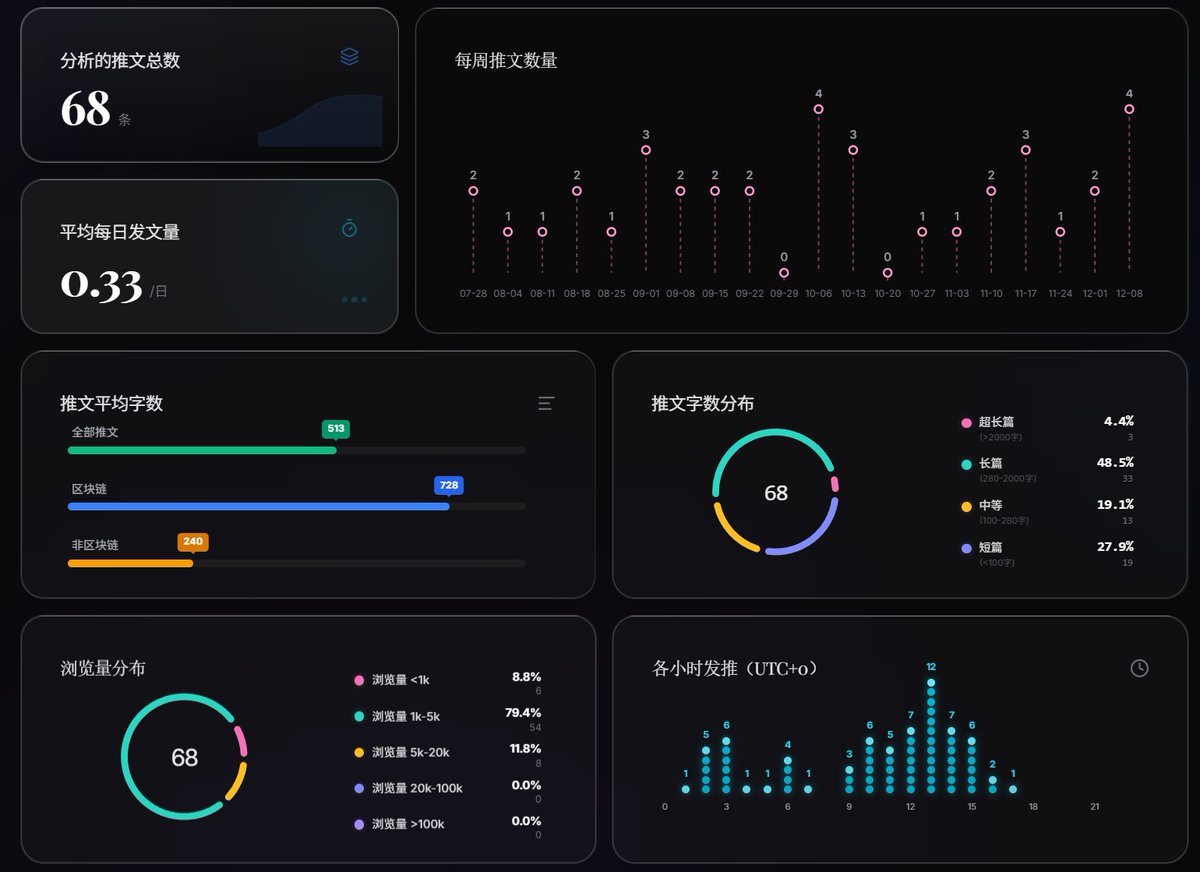
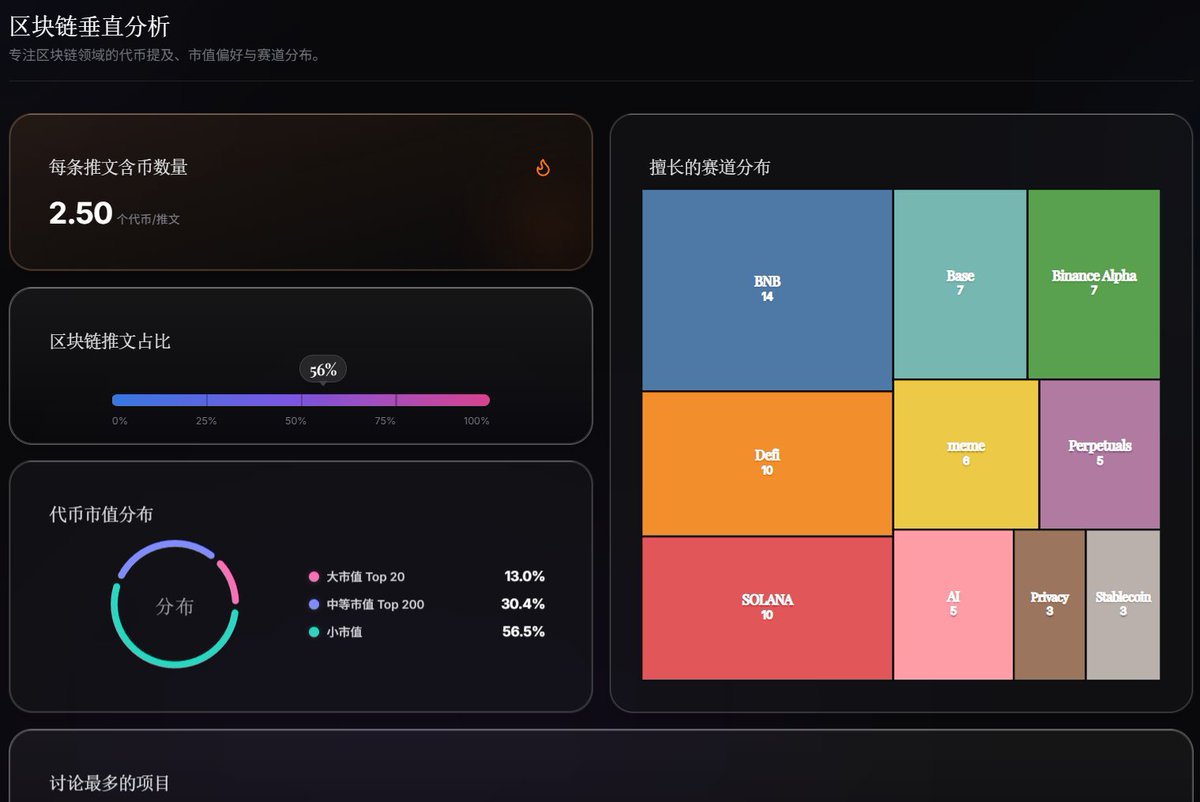
Recently, I vibe coded a product for analyzing KOLs. Now that AI can summarize information from Twitter, I encountered a real-world problem: first, I needed to find impressive KOLs (for example, those skilled in alpha or trend analysis). However, finding such KOLs like Kaito, Xhunt, and Cookie was quite difficult. So, I created different data dimensions for KOLs.
Once the data was ready, I was eager to start on the frontend. I began with full confidence, but it took me a full 5 days, and I had to make up for every lesson I missed.
With the data in hand, I was confident and ready to tackle the frontend. The result? It was truly "blind confidence," and I spent a full 5 days, with no lessons skipped.
So, I’m here to review the "advanced journey" of this frontend page, sharing the hard-earned lessons from my pitfalls.
Level 1
Directly let the large model do it.
For the web version, I recommend using Google AI Studio (Note: this is not the daily chat web version of Gemini, but the developer tool). I had Gemini 3 directly build a frontend page. At this stage, I also mixed in tools like Antigravity's Claude Opus, Gemini 3, and Claude Code.
The first lesson here is: always use real data. If you don’t have it, let AI standardize the data you need. Without data, no matter how good the cost is, it’s useless.
From the results, various methods yielded similar effects, around 75-80 points. This was because I had a lot of data, and the page was quite complex.
Level 2
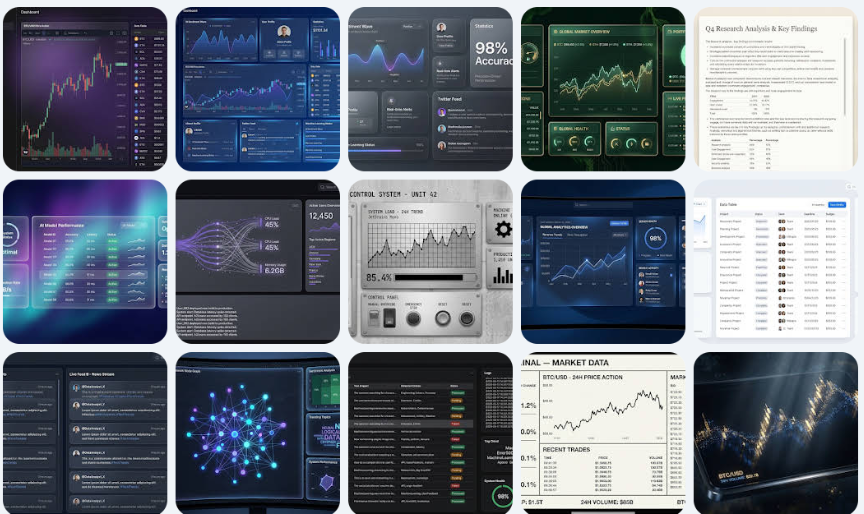
Since letting AI do it directly didn’t yield satisfactory results, I thought of finding a reference image for the desired effect and having AI design based on that. I recommend a website for effect images: https://dribbble.com/. AI suggested several frontend page websites, and after reviewing, this one was the best.
If you’re lucky, you might find something very close to what you want. However, you might also end up like me, finding something similar but not entirely satisfying.
Level 3
When the previous step didn’t meet expectations, the approach for Level 3 is to have AI create the effect.
Specifically, I provided AI with the similar images I found and chatted with it about my ideas, asking for suggestions. One crucial lesson here is to have AI write a prompt for drawing software, allowing it to generate several versions with different colors and styles. After all, the AI is willing to work.
Since I used Gemini 3, I had it write a prompt for drawing bananas. I spent quite a bit of time on this step, and the banana generated many images.
After confirming the style, I recommend having AI write a prompt for the frontend page based on the images. My experience showed that this is simpler than just giving an image to mimic during vibe coding.
Pitfall Experience 3: Google AI Studio is the best "trial-and-error sandbox." After confirming the UI style, let AI write a detailed frontend prompt based on the generated images. Here’s the key point: run the code in Google AI Studio first, rather than jumping straight into the IDE. I was too eager and started directly in Cursor, only to find that the results didn’t meet expectations, thinking it was an issue with Antigravity or the model. Later, I realized it was purely because the prompt wasn’t detailed enough. The advantage of AI Studio is its lightweight nature: you don’t need to install dependencies like Next.js, Supabase, or Tailwind locally, nor do you have to worry about Git; you can directly see if the prompt’s output is correct. This is much faster than modifying code locally.
Level 4
After completing the third step, the webpage reached about 80% satisfaction. Next, it was time to refine the details. This part of the work involved working with AI on the specifics. The most challenging part was needing to know some professional terminology; otherwise, AI might not understand.
At this point, the most troublesome issue was not the logic but aligning the professional terms. For example, if I wanted to adjust a corner radius or create a frosted glass effect, if I didn’t understand CSS’s backdrop-filter or Flexbox terminology, AI might completely misunderstand where I wanted to make fine adjustments.
Well, after all this effort, I finally had some results.
免责声明:本文章仅代表作者个人观点,不代表本平台的立场和观点。本文章仅供信息分享,不构成对任何人的任何投资建议。用户与作者之间的任何争议,与本平台无关。如网页中刊载的文章或图片涉及侵权,请提供相关的权利证明和身份证明发送邮件到support@aicoin.com,本平台相关工作人员将会进行核查。


